Showing posts with label indie. Show all posts

Sunday, October 23, 2016

Easy Halloween Nail Art: Orange and Black Drips

After moving, getting a dog, losing my camera, finding my camera, going on a billion business trips, and surviving a nail art slump, I have new nail art for you for the very best nail art holiday: Halloween! I kept it simple and semi-local, with Gryffindor from Paint Box Polish, based out of my hometown, Richmond Indiana.


Gryffindor is a sparkly burnt orange with gold glittery shimmer and a great formula. This is two easy coats. For the accent, I used Sally Hansen Hard as Nails XTreme Wear in Black Out, my go-to shiny basic black.


When I was running my topcoat over this mani, I noticed an unexpected but super awesome quirk of using these two colors together: Gryffindor surrenders a tiny amount of it's orange and gold sparkle into the black, leaving a lit from within subtle shimmer. It's hard to describe, but it's pretty cool.


This dripping blood look is probably familiar to you if you've been reading for a while. I admit it, it's a total throwback to my Monster Blood nails from 2014. Drip nails are just so incredibly easy and versatile. Black and orange makes it distinctly Halloween-y, and Gryffindor combined with the patent black shine keeps it classy. It also looks good on shorties. About a day into this mani (yeah, by the way, this mani was 3 days old when I took the photos!), my thumb rebelled. I refused to go gentle into that good night, so I filed it down and repainted it with the same design. Still works!


So how does one create this super easy drip design? All you need is a dotting tool (or toothpick, or bobby pin, or anything else with a small, roundish tip). Make three largish dots, then drag the polish upward to the top of the nail, Connect with a stripe of polish on top, arching it a little bit. I like to add a teardrop shaped dab a little further down the nail, too. It's seriously one of the easiest nail art looks I know. It doesn't have to be perfect-in fact, it's a little better if it's not.


What are you wearing on your nails for Halloween? Do you agree that it's the best nail art holiday, or do you have a different favorite?

Monday, February 23, 2015

Black Dahlia Lacquer Blue Half Moons

Nothing super fancy to show today, but I know it's been kind of quiet here recently, so I wanted to drop in and show you a quick nail art look featuring polish from Black Dahlia Lacquer, which is quickly becoming one of my favorite indie brands. The formula is always good, and they have a few distinct finishes characteristic of their polish that I really love, so once you've tried them, you have a pretty good idea of what you're going to get next time. Plus they come in two sizes-great for a blogger on a budget.

The base color of this mani is Texas Ice Flower, from their Holiday Collection. The glitter half moons are Twilight Orchid, which I got as a free mystery polish during their Black Friday sale. It's not currently available on the site.


Here's a closer look at those finishes I was telling you about. Texas Ice Flower has a gorgeous subtle scattered holo glitter that makes it look more "blue, but better" than a true holo polish. This is two coats with Sally Hansen 3D Gel Shine topcoat, with the half moons applied with a dotting tool, no topcoat. For a chunky glitter, Twilight Orchid dried really quickly.


Sorry for the radio silence lately. This has been a bit of an awful month for me personally, which diverted me from some of the nail art challenges, reviews, and other fun things I had planned to do. It's also taken a toll on my nail care routine, so I also don't feel like they've looked very blog ready lately. While I can't say that things are back to normal quite yet on either front, I appreciate that people are still checking out the blog and interacting on social media-it's such a mood booster. Thank you!

Wednesday, February 11, 2015

Does It Work? Tea Bag Wraps

If you follow me on the Twitter, you may be aware that I had a pretty nasty break recently, right on the middle finger of my swatch hand! It wasn't a full break, though; my nail split diagonally to almost the center of the nail, so it would be both painful and cosmetically unpleasant to cut it down, so I'm trying to avoid that. I remembered that I had once tried tea bag wraps with mixed results, so I went to a tutorial on xoVain to give it another shot. While I by no means think I can do it better than the tutorial, I took some pictures tonight to show you how it worked for me.

Oh no!

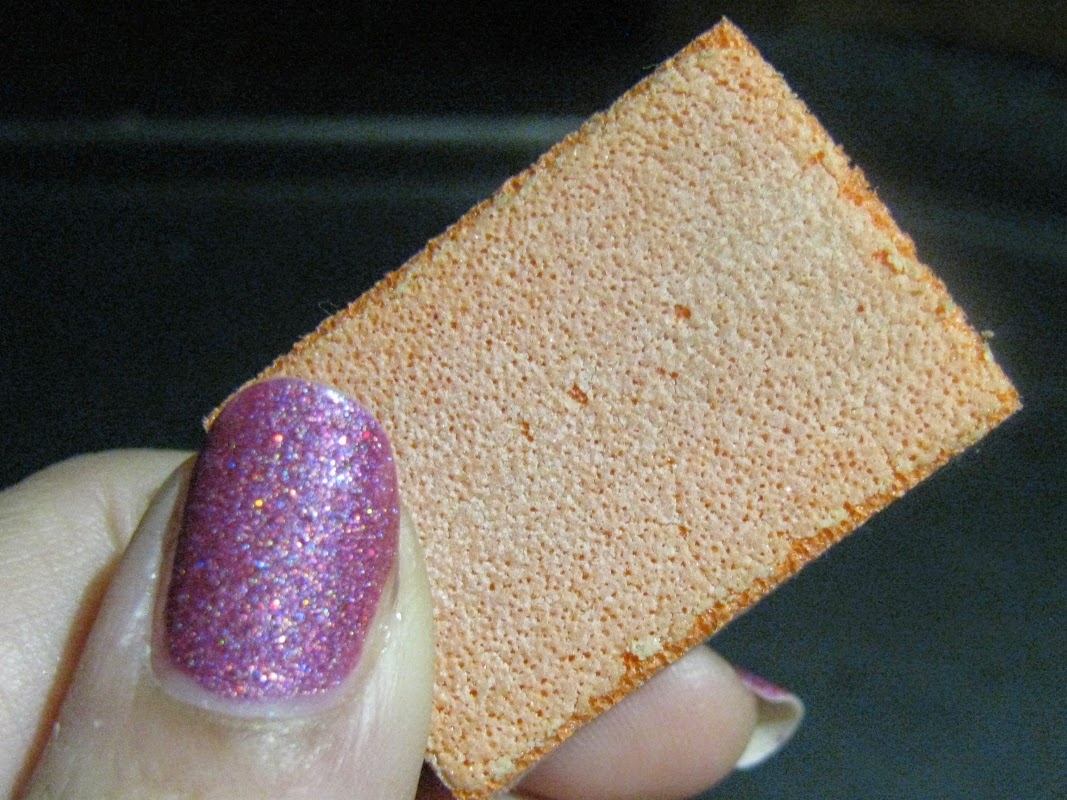
I started off with a gentle buff to smooth everything down. I used an old, worn down mini buffing block-it looks pretty ugly, but it's great for this because you have to absolutely baby the break to keep it from ripping off, plus you want to do as little damage to the nail plate as possible while the nail is growing out.


Then I chopped up my tea bag. You want a piece longer than the nail, but about the same width. The tea bag is a basic cheap-o paper tea bag with the leaves poured out. Both sides are cut, but only because I've used multiple pieces-you only want one "ply."


Next I put a on coat of Nutra Nail Green Tea strengthener (haha!), also swiping the brush under the tip. It's the same basecoat recommended in the tutorial, but I just happened to have it, I'm sure other brands would work too. I gave it a moment to firm up just a touch, because when I tried it fully wet, my tea bag patch slid all over and it just didn't work. It has to be wet to stick, but giving it a minute or so to thicken really makes it stick. The whole break plus a little more should be covered, so I put the edge just past the middle of the nail and carefully smoothed it down with my finger to get rid of any wrinkles or bubbles. I let it dry for a while, then I buffed again, very lightly along the edge of the patch, and clipped most of the extra paper hanging off the nail before putting on another layer of the strengthener.


After that, I let it get mostly dry again, then gently filed the rest of the paper off with my glass file and gave it one more gentle buff before topping with my final layer of base coat.


Where's the break? I dunno!

Then it was ready for my polish-Black Dahlia Lacquer Vibrant Poinsettias. Isn't it gorgeous? And the formula is fabulous-no cleanup required on this hand. The sparkly glitter finish and a copious dose of topcoat helped gloss over any remaining imperfections, being sure to wrap the tip of the nail to seal off the edge of the break.


So does it work? My verdict is yes! I think part of the reason I had trouble with it before is because I am not patient. Notice all of that "let it dry" in this post? Yeah, I'm not so good at that. The multiple layers of basecoat made my nail more susceptible to polish wrinkles, and keeping it smooth keeps the patch strong, so patience is a must. Do this on a Netflix night, because you're going to need to hold still for a while, even with a quick drying topcoat. These patches come off with regular polish remover, just be sure to wipe gently in the direction of the break (my break is sideways, so I remove polish side to side instead of my normal base to tip). I've been pretty gentle with it, but while wearing these patches over the past couple of days, I haven't noticed a difference in strength from my other nails. This is easy, used items I already have, and works well. Time will tell if I can keep it up until my nail is back to a decent length, but if you have a break you don't want to cut off and don't want to use falsies, this is worth a try.

Sunday, January 18, 2015

Tam Tam's Creations Review: Natural Beauty Bonanza

Recently a good friend of mine started her own Etsy shop, TamTam's Creations, so today I have a few of her products to review for you! Unless noted otherwise, these products were purchased by me, and friend or foe, I always provide only honest product reviews.


Before I get into telling you about the products, I have to take advantage of my insider knowledge to tell you more about the company itself. Tamra, the owner, is one of my oldest friends. I've always known her to be someone who takes her health seriously and isn't interested in fads, so when I heard she was starting a natural product company, I knew there was more to it than cashing in on the organic trend. Tamra explained that when she looked for products that weren't loaded with chemicals, heavily processed, or packed in pounds of plastic, she came up empty. Likewise, even the "natural" products were often padded with fillers that she couldn't pronounce. Long story short, she did some research and started making all kinds of organic beauty products on her own. TamTam's Creations was born when she realized that other people wanted the same thing she did: to know what was in their beauty products and how those ingredients work. I had a chance to see some of her processes, and I can personally vouch for her claims that all of her products are made in small batches with only Young Living essential oils, the brand she uses personally. I only ordered lip balm, but by the time I got to see, smell, and touch her products, I came home with lip balm plus a body whip and sugar scrub.

So now for the part you came for: the reviews! First up-lavender peppermint body whip. From the minute I smelled it, I called this "Thin Mint body whip." Tamra put a tiny dab on the back of my hand, and when I felt how soft it left my hands, I knew it had to come home with me. It has a sweet homey smell that reminds me of Thin Mint cookies. I've been using it primarily as a hand cream, and I love this stuff. In the tin it feels almost hard to the touch at room temperature, so I run my finger over the top to produce a little "curl" of product, which quickly melts to the texture of a light oil in your hands as you rub it in. I've been using it obsessively for about 2 weeks now, and my hands and cuticles look amazing, especially considering how dry I normally am at this time of year. I can't stand the greasy skin that usually comes with heavy hand creams, but don't like how thin body lotions on my hands either. This body whip is the perfect compromise-the thickness of a cream with the lightness of a lotion.

Tamra also gave me a sample of her shea butter body butter to try. The consistency was similar on my hands to the body whip, but in the container it had a lighter, softer consistency than the heartier body whip. It comes in several scents. Mine was unscented, but it has a very light, nutty smell from the shea butter. Really nice! I think I prefer the whip overall, but the body butter would be better for spreading over large areas versus as a hand cream or spot treatment for rough patches.
"Thin Mint" body whip (left) and shea butter body butter (right)

The other unplanned purchase was the brown sugar and vanilla scrub. I'd never used a sugar scrub before, so I decided to give it a shot. This scrub isn't sticky (one of the things that had dissuaded me from trying them in the past), and it has a heady, rich scent that reminded me of a good bourbon. Surprisingly, body isn't where I expect to use this most. It's been stupid cold, and my lips have been flaky, so I used it as a lip scrub. I figured all of the ingredients were natural, so what would it hurt to try?
Lip balm and sugar scrub
This was a fine idea, and I'm still pretty pleased with myself for coming up with it. The sunflower oil, which you don't particularly notice in the overall scent, is more pronounced on the lips, giving it a somewhat odd taste. It's not bad-just a strange combination. Otherwise, it's perfect. I rubbed it over my lips for a few seconds, then rinsed off, dabbed with a towel, and layered the lavender and peppermint lip balm over it. The lip balm is a good, solid balm with the same Thin Mint scent and minimal flavor, which is a plus for me. I like my balms to smell good, but I don't like to taste them constantly. The two together, though, were magical. The sugar scrub is 8 whole ounces; it's hard to tell in photos, but this a good sized jar. It does separate a bit, as organics tend to do, but is easy to mix back up.

Look at this adorable little jar!
Sorry for the length of this post-without even trying, I managed to end up with almost the whole line! But that means that I can, in full confidence, recommend that you give TamTam's Creations a try. All of these products are great quality and are extremely well priced ($12-20 is normal for comparable brown sugar scrubs on Etsy, and $7-12 is typical for body whips while hers are $5 each, with the shea butter body butter slightly more expensive but still at the low end of normal at $9). And it gets better: I suggested that Tamra add a cuticle oil to her offerings, and she was one step ahead of me. That's right, a cuticle oil is on its way to me as we speak! If it's as good as these products, I can't wait! For more pictures, sizes, and full descriptions with ingredient lists, check out the TamTamsNaturals Etsy shop.

Monday, December 8, 2014

Black Dahlia Lacquer Review: Capital Rose Garden and Twilight Orchid

Quickie post today-I miss you all terribly, but I have been stupid busy, and by the time I get home at night it's already dark, so I've been taking photos when and where I can while meticulously planning to build my very own lightbox for blog photos so I can take my pictures when I feel like it. But you didn't come to hear me whine. (In my Oprah voice) I have swatches!

I spotted a fantastic sale on the Black Dahlia Lacquer Facebook page and decided to give them a try. Black Dahlia is a newer indie polish brand run by a mother and daughter. For their sale, you get a LE free mystery polish in the same size as the polish you buy, so I chose the petite sized Capital Rose Garden from their newest collection. I absolutely love that they have two different size options, 8 ml and 14 ml. When you have as much polish as I do and want to continue until you've bought all the polish, the option to get a less expensive petite size is very attractive...but now I almost wish I hadn't, because I love this polish SO MUCH. It's exactly what I expected from the website photos, a pinkish mauve with mesmerizing holo sparkle, and it applies like a dream-two easy coats here with HK Girl topcoat.


For my mystery polish, I got a blue glitter topper called Twilight Orchid. It's a sparkly blue glitter in a blue tinted base. While it's not something I would probably have picked myself, it's a nice polish that I was pleased to add to my collection. I couldn't resist the urge to try it alone, but this is really more of a topper. This is three heavy coats. It did dry fairly well, even when applied thickly, and was surprisingly smooth. I am not a fan of over the top texture for the most part, so a smooth finish was a plus for me. Lots of sparkle, and the silvery blue gave it a Cinderella type feel. I followed that up with some nail art, a glitter gradient with a thin glitter tip over a plain french tip white polish. The blue base really pops over the white! This will be a great polish for nail art.


Oops, did I say a this would be a quickie? I guess you should know better by now! Have you tried Black Dahlia? Which polish should be my next?